Overview
LED Matrix Editor - is online tool for editing and creating animations for 8x8 LED matrices. It is free and easy to use.
Usage
- Click on LED to toggle single item
- Click on row or column numbers to toggle whole row or column
- Click on icon to clear/fill whole matrix
- Shift the matrix Up, Down, Left or Right using arrow buttons
- Invert matrix via button
- Rotate matrix clockwise or counterclock-wise
- Insert, Update or Delete images
- Reorder images using Drag-and-Drop in the bottom pane
- Use browser bookmarks to save images
- Use browsing history to Undo/Redo your work
- Choose type of generated code (64-bit integers or arrays of bytes)
- Copy generated C code into your project
- Use predefined sets of fonts and icons
- Play animation with configurable inter-frame delay (in milliseconds)
- Choose matrix color
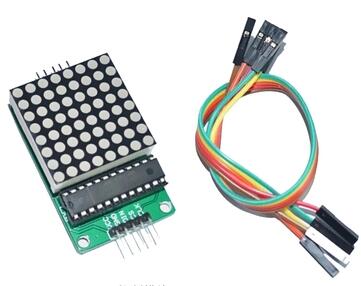
Hardware
LED Dot matrix driven by MAX7219 works perfect with Arduino
Code samples
Samples below implement this animation:

These samples use a LedControl (library for the MAX7221 and MAX7219 Led display drivers) to switch LEDs ON/OFF.
Matrix as a 64-bit long integer
State of the 8x8 matrix can be presented as an unsigned long integer (uint64_t).
In this case the code is pretty compact. Like this code for Arduino:
#include <LedControl.h>

const int DIN_PIN = 7;
const int CS_PIN = 6;
const int CLK_PIN = 5;

const uint64_t IMAGES[] = {
  0xff000001010000ff, 0xff000003030000ff, 0xff000006060000ff,
  0xff00000c0c0000ff, 0xff000018180000ff, 0xff000030300000ff,
  0xff000060600000ff, 0xff0000c0c00000ff, 0xff000080800000ff,
  0xff0000c0c00000ff, 0xff000060600000ff, 0xff000018180000ff,
  0xff00000c0c0000ff, 0xff000006060000ff, 0xff000003030000ff,
  0xff000001010000ff
};
const int IMAGES_LEN = sizeof(IMAGES)/8;


LedControl display = LedControl(DIN_PIN, CLK_PIN, CS_PIN);


void setup() {
  display.clearDisplay(0);
  display.shutdown(0, false);
  display.setIntensity(0, 10);
}

void displayImage(uint64_t image) {
  for (int i = 0; i < 8; i++) {
    byte row = (image >> i * 8) & 0xFF;
    for (int j = 0; j < 8; j++) {
      display.setLed(0, i, j, bitRead(row, j));
    }
  }
}

int i = 0;

void loop() {
  displayImage(IMAGES[i]);
  if (++i >= IMAGES_LEN ) {
    i = 0;
  }
  delay(100);
}
Matrix as array of bytes
Some people prefer to operate with arrays of bytes instead of long integers.
This case is also supported. Here is example of using an array of bytes in binary format:
#include <LedControl.h>

const int DIN_PIN = 7;
const int CS_PIN = 6;
const int CLK_PIN = 5;

const byte IMAGES[][8] = {
{
  0b11111111,
  0b00000000,
  0b00000000,
  0b10000000,
  0b10000000,
  0b00000000,
  0b00000000,
  0b11111111
},{
  0b11111111,
  0b00000000,
  0b00000000,
  0b11000000,
  0b11000000,
  0b00000000,
  0b00000000,
  0b11111111
},{
  0b11111111,
  0b00000000,
  0b00000000,
  0b01100000,
  0b01100000,
  0b00000000,
  0b00000000,
  0b11111111
},{
  0b11111111,
  0b00000000,
  0b00000000,
  0b00110000,
  0b00110000,
  0b00000000,
  0b00000000,
  0b11111111
},{
  0b11111111,
  0b00000000,
  0b00000000,
  0b00011000,
  0b00011000,
  0b00000000,
  0b00000000,
  0b11111111
},{
  0b11111111,
  0b00000000,
  0b00000000,
  0b00001100,
  0b00001100,
  0b00000000,
  0b00000000,
  0b11111111
},{
  0b11111111,
  0b00000000,
  0b00000000,
  0b00000110,
  0b00000110,
  0b00000000,
  0b00000000,
  0b11111111
},{
  0b11111111,
  0b00000000,
  0b00000000,
  0b00000011,
  0b00000011,
  0b00000000,
  0b00000000,
  0b11111111
},{
  0b11111111,
  0b00000000,
  0b00000000,
  0b00000001,
  0b00000001,
  0b00000000,
  0b00000000,
  0b11111111
},{
  0b11111111,
  0b00000000,
  0b00000000,
  0b00000011,
  0b00000011,
  0b00000000,
  0b00000000,
  0b11111111
},{
  0b11111111,
  0b00000000,
  0b00000000,
  0b00000110,
  0b00000110,
  0b00000000,
  0b00000000,
  0b11111111
},{
  0b11111111,
  0b00000000,
  0b00000000,
  0b00011000,
  0b00011000,
  0b00000000,
  0b00000000,
  0b11111111
},{
  0b11111111,
  0b00000000,
  0b00000000,
  0b00110000,
  0b00110000,
  0b00000000,
  0b00000000,
  0b11111111
},{
  0b11111111,
  0b00000000,
  0b00000000,
  0b01100000,
  0b01100000,
  0b00000000,
  0b00000000,
  0b11111111
},{
  0b11111111,
  0b00000000,
  0b00000000,
  0b11000000,
  0b11000000,
  0b00000000,
  0b00000000,
  0b11111111
},{
  0b11111111,
  0b00000000,
  0b00000000,
  0b10000000,
  0b10000000,
  0b00000000,
  0b00000000,
  0b11111111
}};
const int IMAGES_LEN = sizeof(IMAGES)/8;

LedControl display = LedControl(DIN_PIN, CLK_PIN, CS_PIN);

void setup() {
  display.clearDisplay(0);
  display.shutdown(0, false);
  display.setIntensity(0, 5);
}

void displayImage(const byte* image) {
  for (int i = 0; i < 8; i++) {
    for (int j = 0; j < 8; j++) {
      display.setLed(0, i, j, bitRead(image[i], 7 - j));
    }
  }
}

int i = 0;

void loop() {
  displayImage(IMAGES[i]);
  if (++i >= IMAGES_LEN ) {
    i = 0;
  }
  delay(333);
}
Animation data in PROGMEM
Arduino has limited amount of RAM. For example my UNO based on ATmega328P has only 2KB of RAM. Not very much. But it has 32KB of Flash memory. Why not to use it for storing animations? No problem. Just push this data into the PROGMEM and then read them.
#include <LedControl.h>

const int DIN_PIN = 7;
const int CS_PIN = 6;
const int CLK_PIN = 5;

const uint64_t IMAGES[] PROGMEM = {
  0xff000001010000ff, 0xff000003030000ff, 0xff000006060000ff,
  0xff00000c0c0000ff, 0xff000018180000ff, 0xff000030300000ff,
  0xff000060600000ff, 0xff0000c0c00000ff, 0xff000080800000ff,
  0xff0000c0c00000ff, 0xff000060600000ff, 0xff000018180000ff,
  0xff00000c0c0000ff, 0xff000006060000ff, 0xff000003030000ff,
  0xff000001010000ff
};
const int IMAGES_LEN = sizeof(IMAGES)/8;


LedControl display = LedControl(DIN_PIN, CLK_PIN, CS_PIN);


void setup() {
  display.clearDisplay(0);
  display.shutdown(0, false);
  display.setIntensity(0, 10);
}

void displayImage(uint64_t image) {
  for (int i = 0; i < 8; i++) {
    byte row = (image >> i * 8) & 0xFF;
    for (int j = 0; j < 8; j++) {
      display.setLed(0, i, j, bitRead(row, j));
    }
  }
}

int i = 0;

void loop() {
  uint64_t image;
  memcpy_P(&image, &IMAGES[i], 8);

  displayImage(image);
  if (++i >= IMAGES_LEN ) {
    i = 0;
  }
  delay(1000);
}
© 2015-2019 Xantorohara